
The journal
How to block a crochet project without a blocking board, simply
how to block crochet projects using towels, mats, pins and steam; step-by-step wet and pin methods for home crafters.
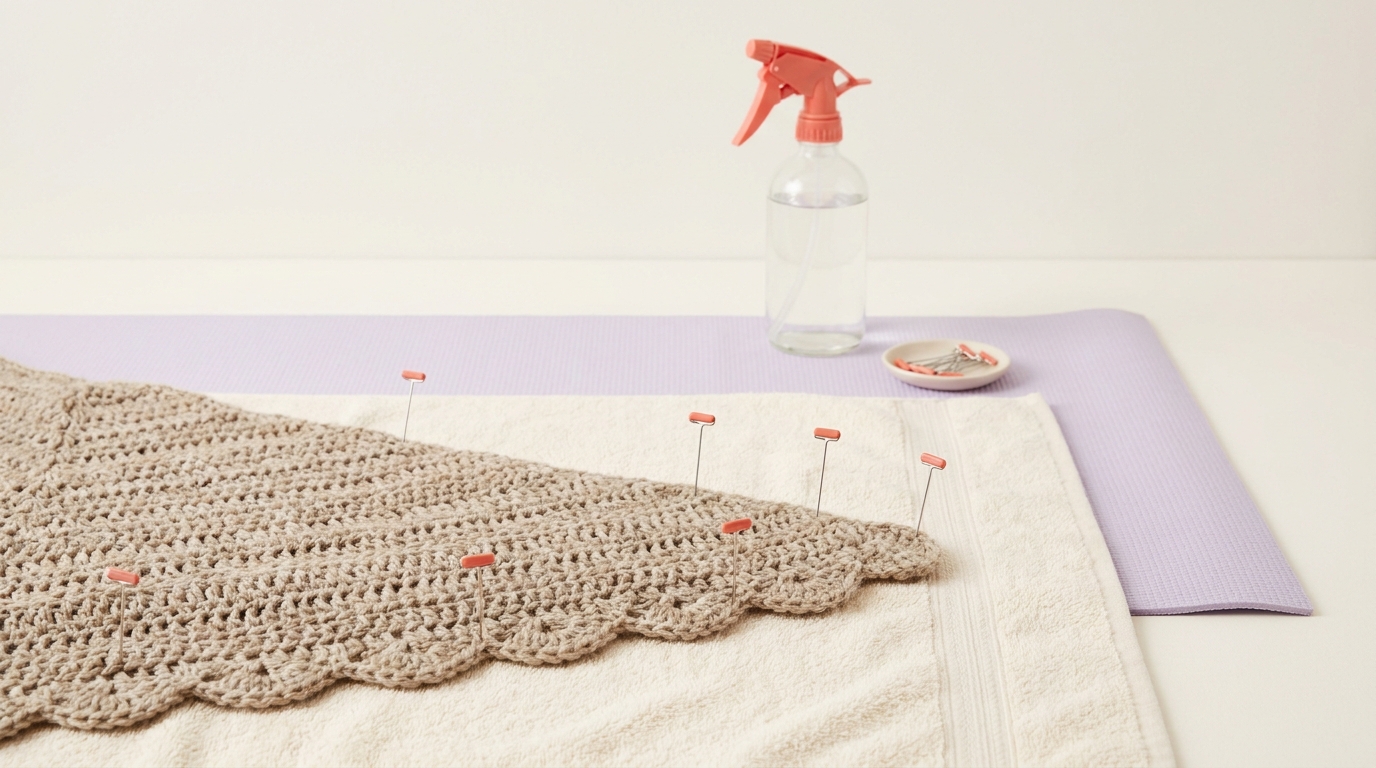
What blocking is and why it matters for crochet
Blocking is the finishing step that evens edges, sets measurements and opens stitch definition so a piece looks intentional and sits well when worn or displayed. If you are wondering how to block crochet projects, the goal is simply to shape and relax the fabric so it finishes at the right size and drape.
There are common approaches: wet blocking, where you soak a piece and shape it flat while it dries; steam blocking, where heat and moisture are used without heavy wetting; and spray blocking, a lighter version where you mist and shape. Each approach changes how much the fabric can be stretched and how fast it sets.
Typical objectives when blocking include straightening scalloped edges, bringing a swatch to gauge, smoothing seams before joining and improving stitch definition in lace or textured patterns. These goals are useful whether you are finishing a garment, flattening a finished afghan or preparing a swatch for accurate measurements.
What is the easiest way to block a crochet piece without a blocking board?
Use a towel over a yoga mat or folded foam as a soft blocking surface, gently shape a damp piece, pin or weigh corners, and let it dry fully for stable results.
As a simple example, imagine a small crocheted square that measures a little short on one side. Wet blocking and gently stretching that edge while pinned on a towel can even the sides and bring the square to the right size without changing the stitch pattern.
When to block varies: block finished pieces that need a final shape, block swatches to check gauge before making a large item, and block panels before seaming if you want straighter joins. For fast wearable items that cannot be fully soaked, consider gentle steam or spray methods instead.
Quick materials and household alternatives to a blocking board
Basic items you probably already have include clean bath towels, a flat protected surface such as a table or bed, a spray bottle, pins or small heavy objects to weigh corners, and a tape measure. A yoga mat or foam exercise mat can make a useful cushioned surface when you do not own a dedicated blocking board.
Optional inexpensive tools that help are rust-resistant pins or T-pins if you have them, a ruler or straight edge to check squareness, and lightweight clamps or binder clips to hold edges taut in place. In place of blocking wires you can use a taut string or a clean thin ruler to get straighter edges for shawls and blankets.
To make a temporary blocking surface, lay one or two thick towels over a padded surface such as a mattress or a yoga mat, smoothing out lumps. For a firmer surface, a folded foam exercise mat under a towel gives the same resistance as a board and accepts pins better than a bare table.
Protect furniture and floors by placing waterproof material between a wet piece and any wood or upholstery. Use a plastic sheet or a large trash bag under towels to catch drips, and change towels if they become heavily damp so moisture does not reach the underlying surface.

When using household substitutes remember safety: avoid pinning on a thin surface that might allow pins to hit a table beneath, and never leave a damp project directly on delicate wood. If you must work on a bed, place a waterproof layer under towels and check moisture after a few hours.
Wet blocking step-by-step without a board
Wet blocking is the most forgiving method for many natural fibers and is often the best way to restore gauge. To begin, choose a clean sink or basin and fill it with lukewarm water and a small amount of gentle soap suitable for yarn, or plain water if preferred. Submerge the piece fully and let it soak for 10 to 20 minutes so fibers absorb water evenly.
Step 1, remove excess water carefully. Lift the piece from the basin supporting its weight so it does not stretch. Press it gently against the basin side to squeeze out water; do not wring. Lay the piece flat on a clean towel, roll the towel with the fabric inside and press or step gently on the roll to remove more moisture. You should have a damp, not dripping, fabric to work with.
Step 2, lay the damp piece on your prepared flat surface, such as a towel over a yoga mat or mattress. Smooth the fabric with your hands into the rough shape you want. If you need a straight edge for a shawl or blanket, run a taut string or a clean straight ruler along the edge and pin through the fabric to the towel to hold it. For garments, pin critical points such as shoulder seams and sleeve caps to the measured dimensions.
Step 3, measure and refine. Use a tape measure to check key dimensions and move pins a little at a time to perfect shape. For lace, open and pin each point so loops are even. For squared pieces, check corners and edges with a straight edge. Take time here; once dry the piece will hold its shape.
Step 4, let the piece dry completely before removing pins. Drying time depends on thickness and room ventilation; allow at least 12 hours for larger or denser items. Avoid using direct heat to speed drying, which can damage or stiffen fibers. When fully dry, unpin gently and check the final measurements against your desired size.
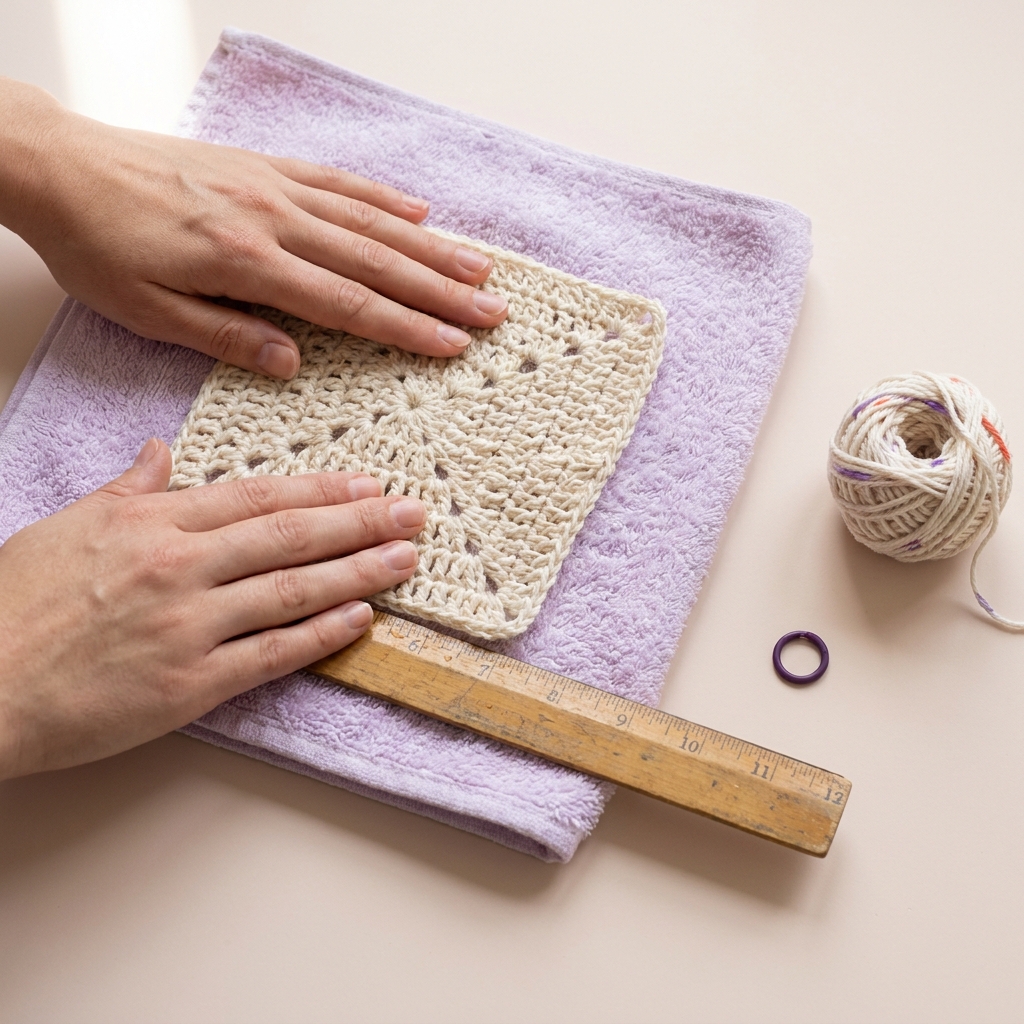
Safety note: delicate or very stretchy yarns should be handled with less tension while pinning. If a yarn seems to thin when stretched, use lighter shaping and consider spray blocking or partial wetting instead.
Steam and pin blocking when you cannot lay a piece flat
Sometimes a garment cannot be laid flat—for instance, a fitted sleeve or a shaped collar. Steam blocking uses heat and moisture to relax fibers while the item is pinned or supported in its intended shape. This method is useful when a full soak is impractical or when fabrics are too large to handle comfortably on a flat surface.
Choose steam over wet blocking when the yarn can tolerate heat and brief moisture, and when the piece benefits from shaping on a form rather than flat. Wool and many natural fibers respond well to careful steaming, while many acrylics and thermoplastic blends can soften or distort under heat and deserve a lighter touch.
handheld steamer or iron used at a safe distance to relax fibers
To steam safely without a board, pin the garment onto a padded surface such as a folded towel over a mattress or a yoga mat, supporting three-dimensional shapes with rolled towels or thin foam pieces where needed. Hold the steamer or iron upright several inches from the fabric and release brief bursts of steam; do not press the iron directly onto textured stitches unless using a pressing cloth.
Pin pieces into the final shape while still warm and slightly damp from steam, then let them cool and dry fully before unpinning. Use makeshift supports such as rolled towels or foam cylinders to keep collars, cuffs or sleeve caps in their intended curve while cooling. Avoid over-steaming acrylic or similar synthetics; if the yarn reacts by looking shiny or becomes misshapen, stop and use a gentler method.
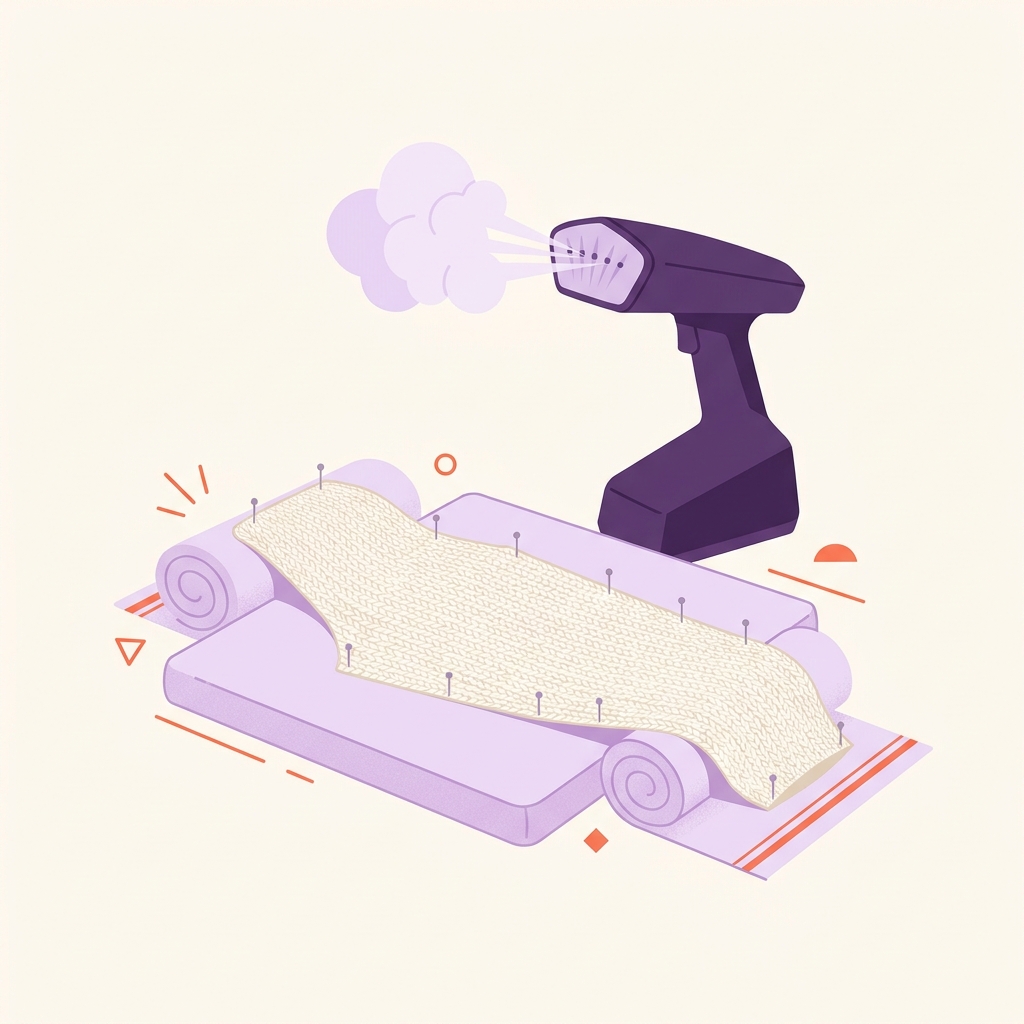
Pinning patterns for shaped areas means placing pins where the fabric naturally needs support: along seams, at crown points and at the base of curves. When using heat, space pins so they do not create impressions, and lift the steamer frequently to avoid concentrating heat in one spot. For items that must be three-dimensional when dry, consider shaping on the body or a mannequin substitute covered in a towel and pinned gently.
Always test steam on a small hidden area or a scrap swatch first. If the yarn shows any sign of melting, discoloration or an unwanted change in texture, stop and choose spray or wet blocking for a safer result.
Adjusting technique by yarn type and common mistakes to avoid
Natural fibers such as wool and cotton generally respond well to wet blocking; wool often benefits from a gentle steam or wet block to set stitches and improve drape, while cotton will hold a pressed shape and may need more time to dry. Synthetics such as acrylic resist permanent reshaping and can be sensitive to heat, so use minimal tension and prefer spray blocking for those yarns.
Common mistakes include over-stretching fabric when pinning, which can leave a permanently stretched appearance, uneven pinning that causes wavy edges, and blocking before seams are sewn, which can complicate final joining. Avoid pulling hard on corners or forcing a piece to a size well beyond its relaxed stitch memory.
If blocking goes wrong, simple fixes often help. Rewetting a small area and reshaping with gentle pressure can relax overstretched spots. For minor unevenness, re-pin only the affected section and allow it to dry again. If heat has slightly flattened texture, reintroduce a bit of moisture and lift stitches by hand before drying to restore pattern definition.
Be mindful of finishes and treatments on some yarns. Superwash wool takes different handling than untreated wool, and certain treated fibers may be less tolerant of repeated wetting or heat. When unsure, create a practice swatch and try the chosen method to see how the fiber behaves before working on the final piece.
Deciding, finishing and next steps
Use a simple decision checklist before you start: match the fiber to the method, consider the final shape you need, check the space available for laying a piece flat, and allow enough time for complete drying. If the yarn is heat-sensitive or you do not have a firm flat surface, favor spray or steam with light tension rather than a full wet soak and heavy pinning.
Final checks include verifying measurements with a tape measure, inspecting stitch definition around edges and seams, and ensuring the piece is fully dry before any sewing or wearing. Store blocked pieces flat or folded according to fiber recommendations; many natural fibers benefit from airing and then flat storage while synthetics can be folded without issue.
To build confidence, try two small practice projects: a 10 cm square swatch in your chosen yarn to test blocking and a small scarf or headband to practice shaping long edges. These low-stakes pieces help you learn how much tension to use with pins, how your yarn responds to steam, and how long drying takes in your space.
Blocking is a skill that becomes quicker with a few simple routines. With towels, a yoga mat and a few pins you can get consistent results that make your handmade items look polished and intentional. Whether you are exploring pin blocking, experimenting with blocking wires alternatives or learning flat drying crochet methods, small practice steps lead to steady improvement.
Frequently asked questions
When should I block my crochet project?
Block finished pieces that need final shaping, swatches to check gauge before larger projects, and panels before seaming if you want straighter joins.
Can I steam block acrylic yarn?
Use steam cautiously with acrylic; many synthetics are heat-sensitive, so prefer light spray blocking and test on a scrap first.
How long does a blocked piece take to dry?
Drying time varies by thickness and ventilation; allow many hours or overnight for larger items and ensure the piece is fully dry before unpinning.
Blocking is a low-cost technique that raises the visual quality of handmade crochet. Start with a small swatch, try one method at a time, and you will gain a reliable routine that suits your yarn and workspace.