
The journal
What type of paper is best for making paper beads, and how to choose
how to make paper beads: a practical guide to choosing paper, cutting strips, rolling, sealing and finishing for durable, attractive beads.
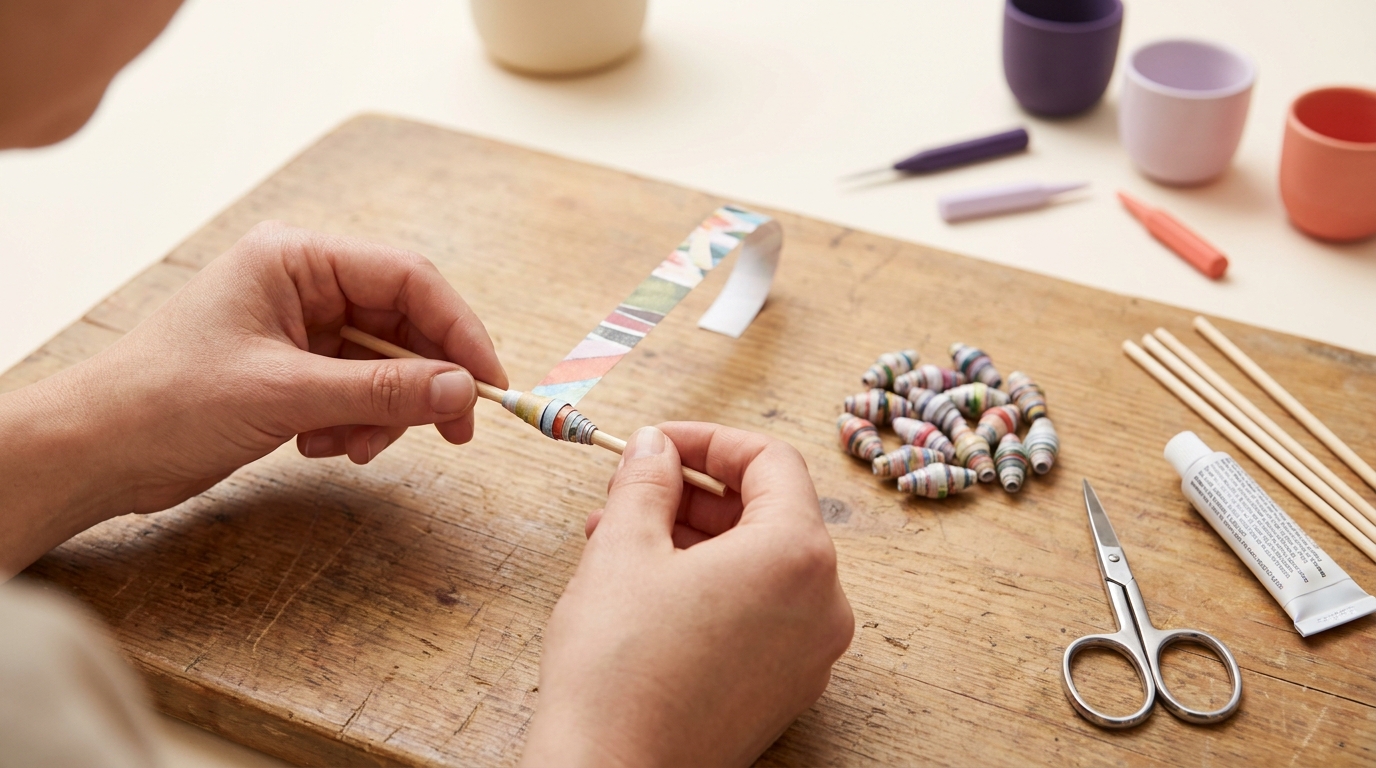
What paper beads are and why the paper you choose matters
What a paper bead is and where it is used
At its simplest, a paper bead is a small tube or cone of paper rolled tight and sealed for use as a bead in jewelry and decorations. Makers use paper beads for bracelets, necklaces, earrings, keychains and decorative garlands. For a beginner, the craft is about turning flat sheets into three dimensional, lightweight components that add pattern and color without metal or clay.
How paper characteristics change bead appearance and strength
How to make paper beads starts with picking paper that matches your goal. Paper thickness, finish, printed pattern and the direction of the grain all change how a roll behaves. Thinner papers roll into smaller, more delicate beads that feel light on the skin. Heavier papers produce beads that sit larger and hold shape better. A glossy finish can make colors pop and make sealing easier to wipe smooth, while a matte finish soaks in finishes differently and gives a softer look. Grain direction affects how the paper flexes as you roll and can influence whether the bead looks smooth or slightly faceted when dry. See our step-by-step guide for more on technique.
Different craft goals need different choices. Choose lightweight paper when you want many small beads for a delicate bracelet. Pick thicker paper for chunky, statement beads that need structure. Consider print scale: a tiny repeat pattern will disappear on a large bead, while a bold print works well on bigger shapes. Finally, remember sealing is a separate step that strongly affects longevity and finish; a good seal can compensate for some paper weaknesses without changing the original texture.
Paper types to name include cardstock, magazine paper and origami paper, and each has typical uses in craft bead making. Cardstock resists bending and is sturdy for larger beads. Magazine pages are glossy and print-rich, great for colorful, lightweight beads. Origami and specialty papers give neat edges and consistent color for smaller, refined beads. You will also need glue and a sealant to finish beads so they last longer in wear.

Magazine paper and thin wrapping paper make bright, small beads with strong printed color. They are easy to roll and good when you want many tiny beads. See a rolled paper beads tutorial for a simple classroom-style method.
Heavier papers for chunky or structural beads
Cardstock and heavyweight scrapbook paper create chunky beads that keep their shape. These materials can make statement pieces without many layers. They are less forgiving to roll because thickness adds resistance, so cutting accurate tapers and using a firm roll method helps maintain a neat center hole. For an example of a wider-bead technique, see this Instructables tutorial.
Patterned and specialty papers for visual effects
Origami paper, decorated papers and wrapping paper offer patterns and textures that translate directly into the bead surface. Some specialty papers have a textured finish that gives beads a handcrafted feel. Using patterned paper is a visual design choice: small-scale prints read as texture on tiny beads, and large motifs can be positioned to show a pleasing repeat on a single large bead. Before committing to a batch, roll a few test beads to see how the scale reads when rolled.
Cut accurate strips for consistent beads
When choosing paper for a specific bead style, weigh appearance against durability and ease of rolling. A glossy magazine page gives strong color and easy rolling but needs a protective seal to avoid rubbing and moisture damage. Cardstock gives durability but can be harder to roll if you attempt very small beads. Wrapping paper can be thin and decorative but sometimes peels if it has a loose coating. Always make small test beads to check how your chosen paper behaves with your preferred sealant.
Preparing paper and cutting strips for consistent beads
Choosing strip width and tapered templates
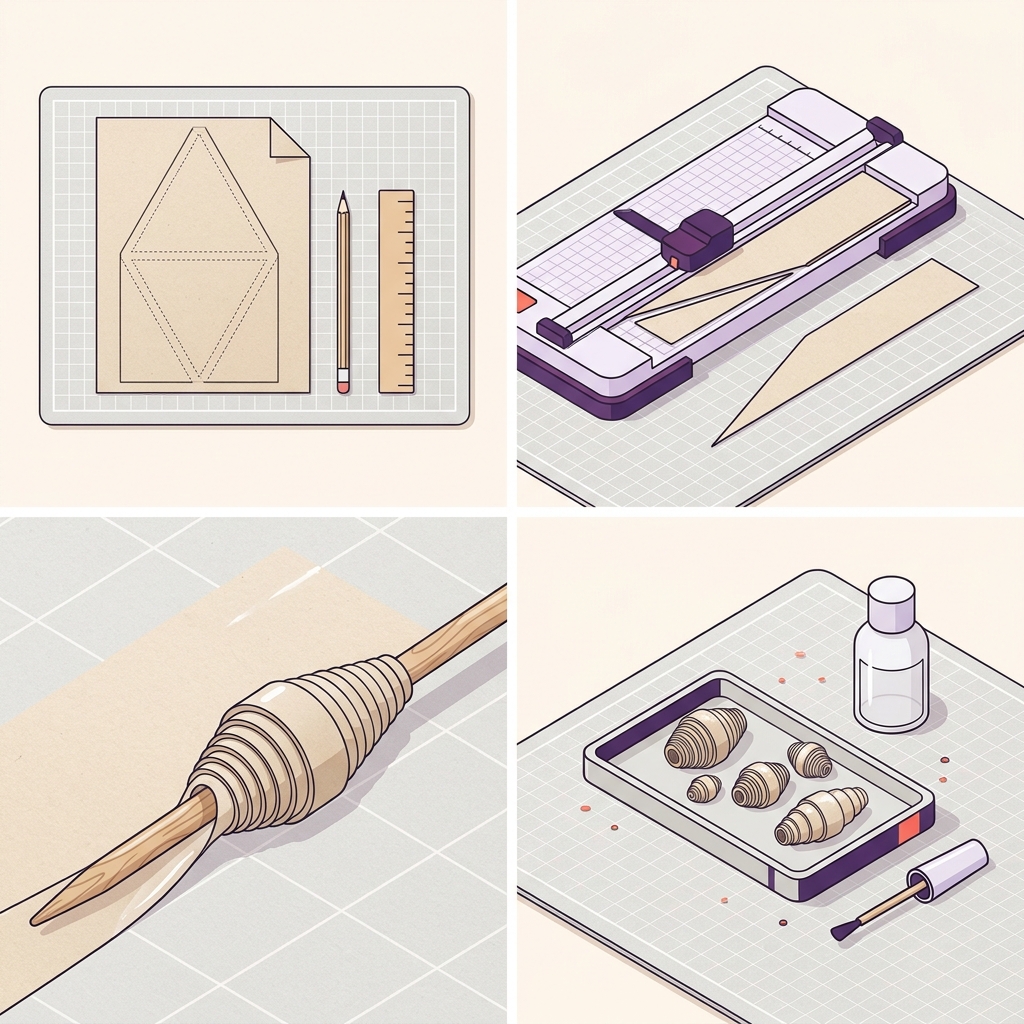
Good beads start with consistent strips. How to make paper beads becomes easier when you decide the desired bead length, then create a tapered template that narrows to a point at one end. The taper determines bead shape: long narrow tapers give elongated beads, while short wide tapers produce rounder beads. Mark a simple template on scrap paper and use it as a guide when cutting multiple strips so the finished beads match in size and shape.
Strip width also affects the hole size and final bead diameter. A wide strip wraps into a larger bead with more layers, so for small, delicate beads use narrow strips. For strong, chunky beads allow for wider strips and fewer rolls. Avoid guessing: print or draw a template you like and test it on a scrap sheet first to see the result before cutting a full batch. See our paper crafts and cardmaking guide for related layout and cutting tips.
What paper should I use to make paper beads?
Match the paper weight and finish to your desired bead size and durability: thin glossy papers for small colorful beads, heavier cardstock for chunky, structural beads, and specialty papers for decorative effects.
Tools and tricks for cutting accurate, repeatable strips
Use a ruler and a sharp craft knife or a paper trimmer to get clean edges. A cutting mat protects your surface and helps the blade last longer. If you do many strips, consider batch-cutting by folding the sheet carefully and trimming multiple layers at once, but only after you test that the fold aligns precisely. Keep a pencil for light marks and a template that you can trace onto the back of patterned papers where marks are less visible.
Work on a flat surface and take breaks if your hands tire; steady pressure yields straighter strips than rushed cutting. When trimming patterned paper, align the pattern relative to your template so motifs repeat in a pleasing way across the bead. For fragile or layered papers, handle edges gently to avoid frayed or softened tips that can make rolling messy.
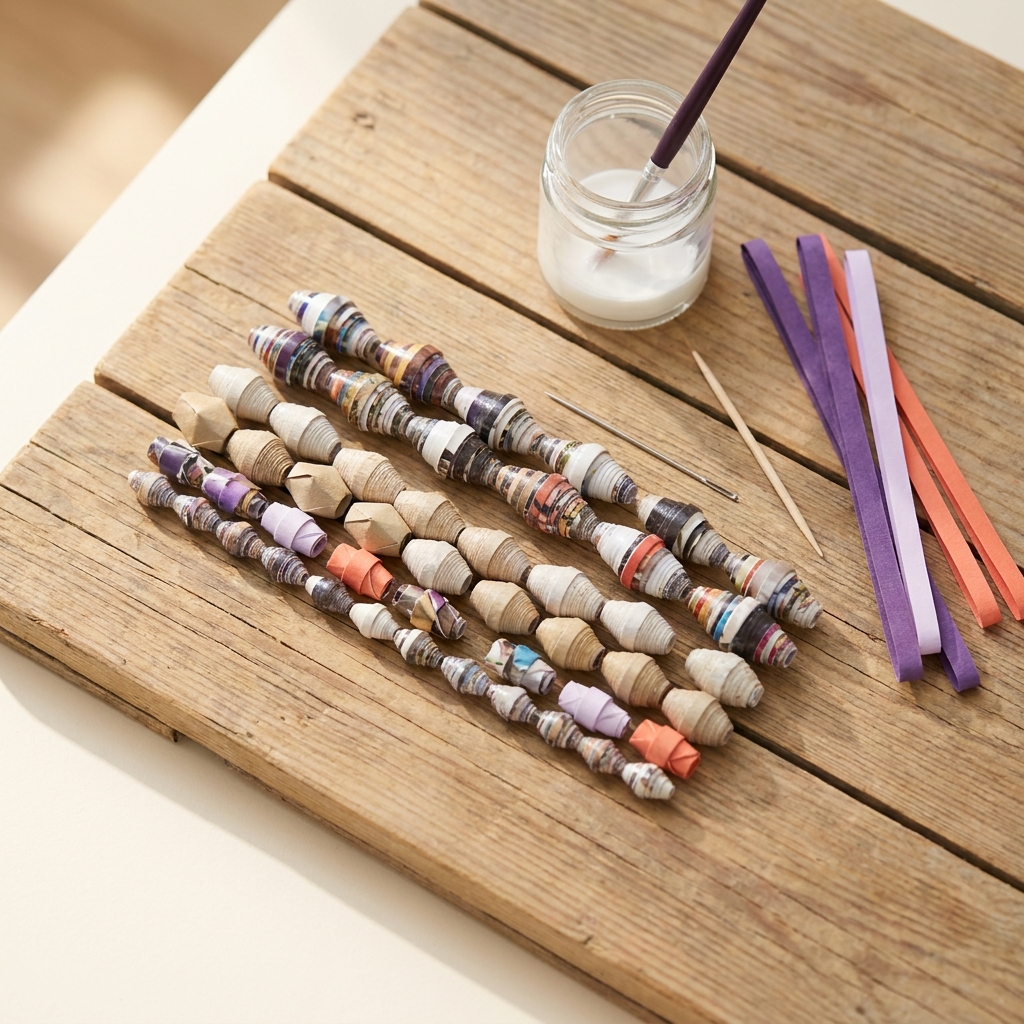
Start rolling from the wide end toward the tapered point, wrapping evenly and keeping tension consistent so the bead forms a neat cone or tube. Use a toothpick, thin dowel or a beading needle as the core; hold the core at a slight angle to help the paper lay flat as you roll. Pull the strip gently but firmly so each layer sits snugly without bunching. If the roll loosens, unroll a little and rewrap with firmer tension.
If you want to remove the core after sealing, roll with a core that is easy to extract, such as a toothpick. For beads that keep a fixed core, use a thin dowel that stays as part of the bead assembly. The choice affects how you string the beads: removable cores leave a center hole that can take thicker string, while retained cores may require smaller findings or further drilling.
Sealing options and finishes for durability and shine
Sealing protects paper beads from moisture and wear. Common household options include PVA glue diluted slightly with water for a matte finish, decoupage medium for a smooth finish, or a clear varnish for tougher shine. Apply sealant in thin, even coats and let beads dry fully between coats. Multiple thin coats build stronger protection than one thick coat, which can pool and leave uneven areas.
After sealing, let beads dry on a clean surface where they will not stick. For some finishes, buffing gently with a soft cloth improves shine. If you want a smoother hole for stringing, sand the bead ends lightly with fine sandpaper once the sealant is dry, then clean and seal the sanded area to keep it consistent with the rest of the bead surface.
Common mistakes and how to avoid them
Cutting and rolling mistakes that lead to poor beads
Uneven strips cause lopsided beads. If one edge is sloppy, the roll will shift and create a larger hole or an off center bead. Fix this by trimming a straight edge before you begin rolling and by using a template to guide each strip. Rolling too loosely results in beads that fall apart after sealing; rolling too tightly can warp the paper and make the hole too small. Aim for a steady tension and check the first few wraps before you commit to the whole strip.
Using the wrong paper weight for your intended bead style is another frequent error. Try a few test beads to judge whether a paper will hold its shape. If a bead feels fragile or bends easily after sealing, choose a heavier paper for the next batch or add more layers before sealing.
Sealing and finishing mistakes that reduce durability
Pooling glue or applying thick sealant leaves spots that dry tacky or uneven. Apply sealant in thin, even coats and allow full drying time between layers to avoid tackiness. Peeling sealant usually comes from not prepping the surface; make sure the bead surface is free from dust and oils before sealing. If a seal shows early wear, reinforce it by sanding lightly, cleaning the surface, and applying a thin new coat focused on the worn areas.
If beads become brittle after sealing, the finish may be too strong for thin paper. Test sealants on scrap strips to see whether the result remains flexible. For brittle beads, recoat with a more flexible medium or layer glue inside the bead before sealing to help the inner layers resist cracking.
Practical projects and scenarios using different papers
Beginner-friendly bracelets and keychains
For a first project, make small, lightweight beads from magazine paper and string them on elastic for an easy bracelet. Use a consistent taper and seal with a decoupage medium for shine. Keep other components simple: spacer beads or metal findings help protect paper beads from wear at contact points and make the finished piece look intentional.
Keychains are another beginner option. Make larger beads from thicker wrapping paper or cardstock so they withstand handling. Seal carefully and use a split ring with a metal eye pin to anchor the bead securely.
Intermediate projects and gift ideas
Combine beads made from different papers for layered visual effects. Use patterned origami paper for small accent beads and cardstock for larger statement pieces. Mix in metal spacers or wood beads to balance weight and add contrast. For a gift, present a matching set like a necklace and bracelet where bead sizes and patterns align to form a coherent design.
Upcycling paper into patterned bead strands
Upcycling old magazines, maps or flyers is a sustainable way to gather materials and produce striking patterns. Cut strips so a specific image or color falls on each bead for a consistent motif along a strand. Take care with coated or heavily glossy pages: test sealing to ensure the finish bonds well and does not peel with wear. Store finished pieces away from damp and direct sunlight to preserve color and seal integrity. See National Geographic Kids' Make paper beads for a child-friendly activity idea.
Across projects, small test batches save time and improve results. Try different sealants and stringing techniques on scraps first. Label your test pieces so you remember which paper and finish produced each effect, then scale up the successful combinations.
Frequently asked questions
What paper is easiest for beginners?
Thin glossy papers like magazine pages are forgiving to roll and show strong color, making them a good starting point for beginners.
How should I seal paper beads?
Apply thin, even coats of PVA glue, decoupage medium or clear varnish, letting each coat dry fully before the next; test on scraps first.
Can paper beads withstand water?
Paper beads resist light moisture when sealed well, but prolonged exposure to water can weaken the paper and the sealant.
Choosing suitable paper makes most of the difference in how your paper beads look and last. Start small, test your materials, and refine techniques rather than rushing a large batch. With practice you will learn which papers and finishes match your personal style. Keep a small notebook of tested combinations for future projects and enjoy the process of turning simple paper into lasting craft pieces.
References
- https://madeinsteps.com/articles/how-to-make-paper-beads-step-by-step/
- https://madeinsteps.com/guides/paper-crafts-and-cardmaking/
- https://madeinsteps.com/guides/craft-cutting-machines/
- https://www.smallhandsbigart.com/rolled-paper-beads/
- https://www.instructables.com/How-to-Make-a-Wide-Euro-Paper-Bead/
- https://kids.nationalgeographic.com/nature/kids-vs-plastic/article/paper-beads
- https://media.madeinsteps.com/brand/wordmark-792fa3c17e.svg