
The journal
What is the best way to trace pattern pieces onto fabric? A practical step by step guide
how to transfer pattern onto fabric: step by step methods, tool choices and a bodice tracing example to help home sewers get accurate cuts.
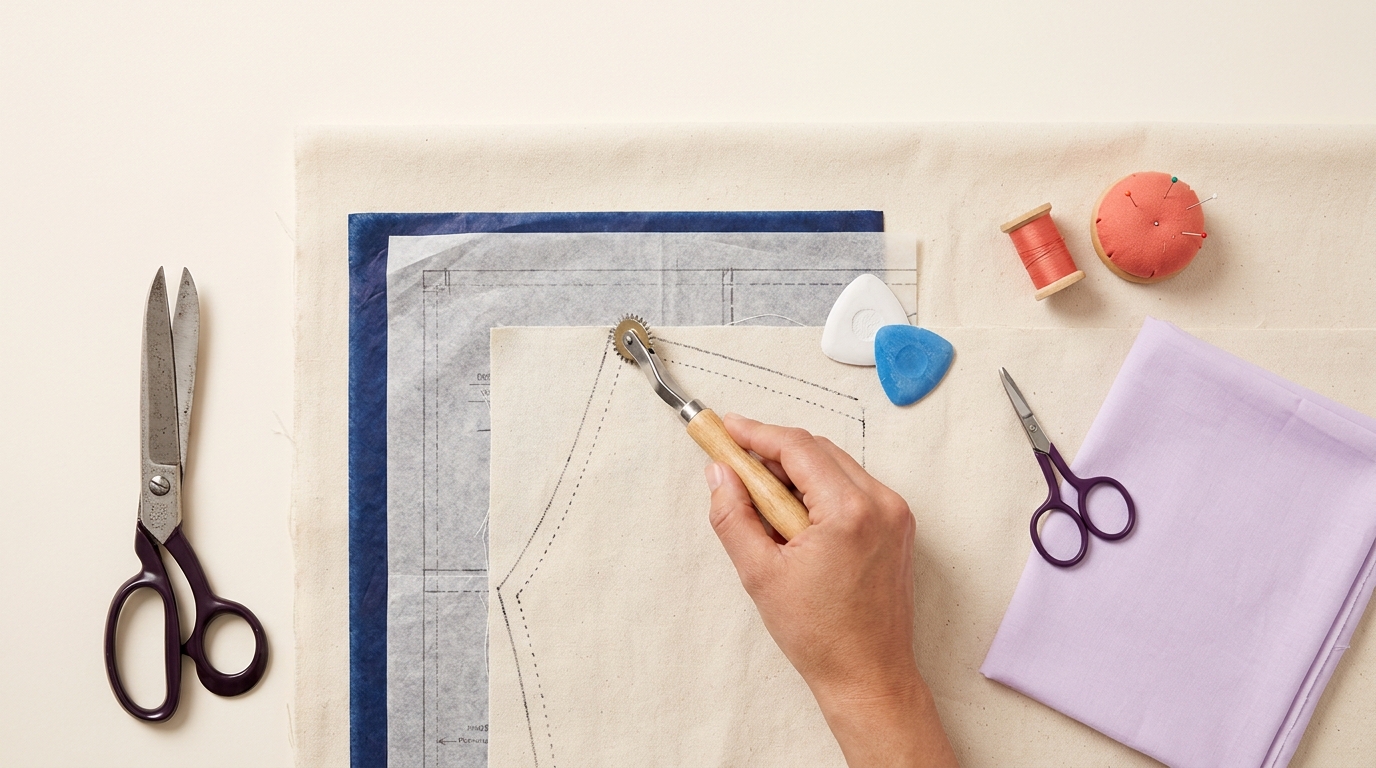
How to transfer pattern onto fabric: quick overview and what you need
Learning how to transfer pattern onto fabric sets the tone for accurate cutting and confident sewing. Good transfers let you match pieces, sew straight seams and place darts and notches where they belong. In this quick overview we focus on practical supplies and the purpose behind each marking so you can pick a method that fits the fabric and your skill level.
Why accurate transfer matters
Accurate markings ensure pattern pieces meet at seams, darts shape correctly and small details like notches line up during assembly. When those marks are clear and placed precisely on the fabric, you reduce fitting hassles later and save fabric from unnecessary trimming.
Pattern weights, tracing paper and a tracing wheel can copy outlines without pinning every edge. Tailor's chalk and washable pens give fast, removable lines on many fabrics. Knowing why you make each mark helps you choose the right tool for the job.

Essential supplies at three budget levels
Core tools that appear in nearly every project are pattern weights, tracing paper or dressmaker carbon, a tracing wheel, tailor's chalk and a washable fabric pen. A basic kit will let you mark outlines and key internal points. Upgrading adds a ruler with a curved edge, fine tailor's needles for basting and a small pressing ham for curved seams.
For beginners, a small set of pattern weights, a pad of tracing paper and a washable pen cover most needs; see our beginner sewing guide.
Safety and fabric considerations
Choose marking tools with removability in mind. Test any pen or chalk on a fabric scrap and launder that scrap before you trust the mark will wash out. Also watch the fabric grain and stretch. Marking across the grain or stretching fabric while tracing can distort the shape of the piece.
Some fabrics resist visible marks or show ghosting after removal. When in doubt, test on a swatch and prefer temporary basting or pinning for fragile textiles. Keep a small pair of sharp fabric scissors, a pressing iron and fabric-specific needles on hand to avoid damage while cutting.
Preparing pattern pieces and fabric before transfer
Check pattern layout, grainlines and seam allowances
Begin by reading the tissue pattern. Confirm grainlines are clearly marked and check the seam allowance noted on each piece. Align the grainline marking with the fabric grain so the finished garment drapes and stretches as the designer intended.
Double check any internal markings such as dart points and notches on the pattern tissue. Make small pencil ticks on the tissue if a marking is faint so you do not lose the detail as you lift and handle pieces during transfer.
Prepare and stabilize fabrics
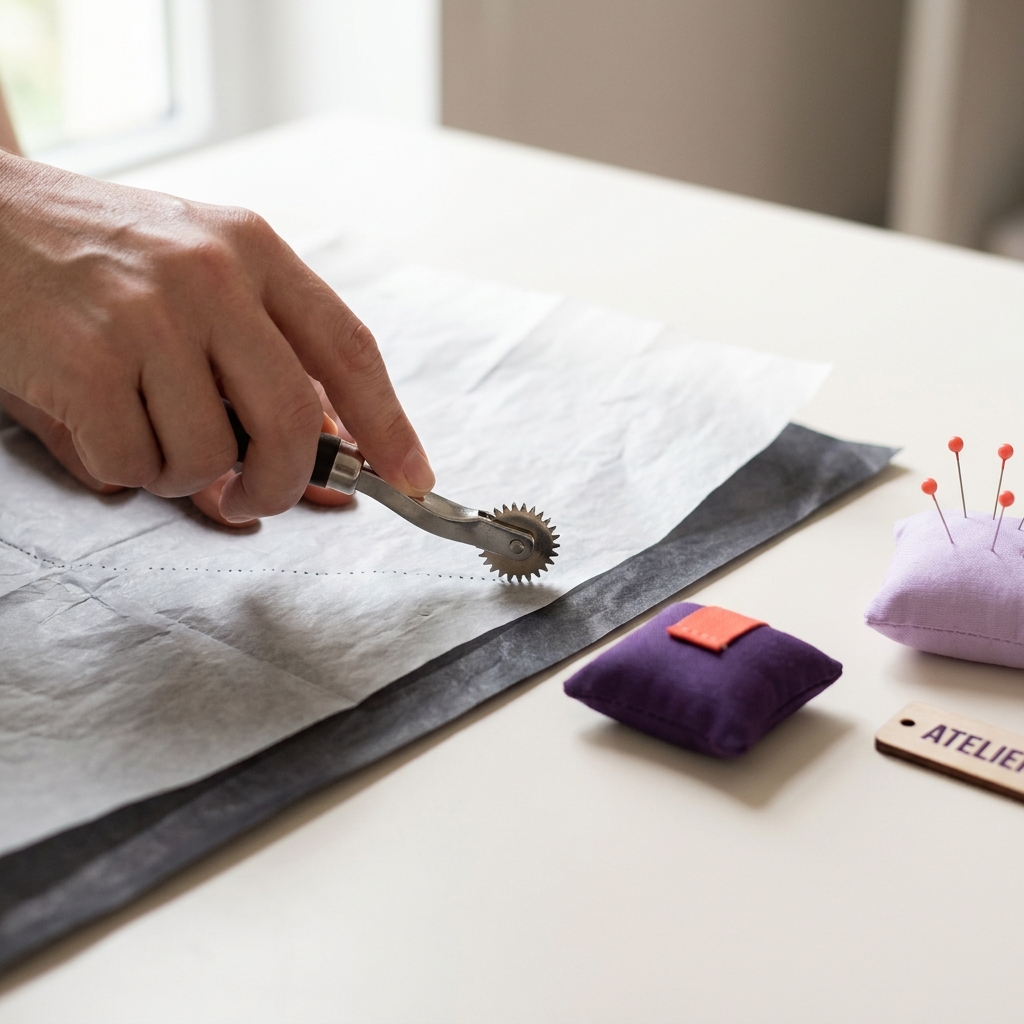
Prewash or presteam press fabrics according to their care instructions before laying the pattern. This prevents later shrinkage or distortion after you cut. Press gently; some fabrics need a press cloth to avoid shine.
If a fabric is very light, sheer or loosely woven, consider a lightweight stabilizer beneath the area you will mark. A soluble or tearaway stabilizer can support markings and prevent the tracing wheel from pulling yarns. For knits, use minimal handling to avoid stretching and consider pinning more frequently to keep pieces stable.
Positioning and pinning for minimal distortion
Lay fabric on a large flat surface. Fold along the correct fold line when required and smooth wrinkles before placing pattern pieces. Use pattern weights near corners and mid edges to hold tissue flat without over pinning.
If you do pin, insert pins perpendicular to the cutting line and keep the tissue flat. Avoid lifting and shifting the tissue while tracing. If you expect to move the whole layout to a cutting mat or another table, baste a few spots to keep everything in place.
Main methods to transfer pattern onto fabric: tracing, marking and pinning
Method A: Tracing with tracing paper and wheel
Tracing with a tracing wheel and dressmaker carbon is a controlled way to copy outlines and internal markings. Lay the carbon between the tissue and the fabric, then run the tracing wheel along the pattern lines. This transfers both outer edges and interior points like dart legs or pocket placements without writing directly on the fabric. See a beginner's insight for more at Deborah J Sews.
This approach works well for stable woven fabrics that accept a thin carbon layer. It is tidy, repeatable and leaves little ambiguity at sewing time. Use a medium-tooth wheel for most fabrics and a fine-tooth wheel for delicate cloth. Always test on a scrap to check how the carbon removes. Tilly and the Buttons also recommends dressmaker's carbon for tracing in many projects.
What is the simplest reliable way to transfer pattern markings for a beginner?
For most beginners working with stable woven fabrics, tracing with dressmaker carbon and a tracing wheel or marking short tailor's chalk lines offers a good balance of visibility and removability. Test on a scrap and use pins or pattern weights to prevent shifting.
Method B: Direct marking with chalk, pencil or washable pen
Direct marking is fast. Tailor's chalk provides bold, removable marks on most woven surfaces and is easy to brush off or steam out. Fabric pencils or washable pens can give finer control for darts and notches. Water-erasable pens are useful but must be tested, because some fabrics react unexpectedly or show ghosting after wetting.
For dark fabrics, choose a white or light chalk. For medium and light fabrics, a fine fabric pencil gives precise lines. If you need a temporary guideline that disappears after steam pressing, choose a chalk that brushes away cleanly or mark with tailor tacks using thread.
Method C: Pinning and cutting from the tissue as a guide
The pin-and-cut or baste-and-cut approach avoids making any permanent marks. Pin the tissue pattern to the fabric with pins close to the cutting line, or baste the tissue with long temporary stitches, then cut through both layers at once. This method is especially helpful on fabrics where markings could damage the surface or on very sheer materials. See a similar walkthrough at SewDIY.
Pin-and-cut is useful when working with slippery or delicate fabrics. Take time to pin evenly around all curves and notches. If you baste, remove the tissue and the temporary stitches only after seams are sewn or after you have reinforcement in place.
How to choose the best method: decision checklist
Match method to fabric type and pattern complexity
Decide by answering a few quick questions. Is the fabric sheer, knit, heavy or textured? Do you need many interior marks like dart legs and pocket placements? Will marks be visible while you sew or only helpful at cutting time? Your answers guide whether you trace, mark or pin.
Try to keep the number of marks to the minimum you need. For simple straight seams on stable cotton you can use either carbon tracing or chalk marks. For fine lace or sheer silk, prefer pin-and-cut or basting so you do not risk visible residues.
Quick checklist to choose a transfer method
Consider permanence, visibility and ease of removal
Choose a tool that gives marks visible enough for sewing but easy enough to remove without damage. Tailor's chalk and dressmaker carbon are visible on most wovens and remove cleanly. Water-soluble pens leave clean lines but require care with moisture. If a mark must last through multiple fittings, consider tailor tacks made with thread, which leave tiny removable stitches rather than surface marks.
Always test both visibility and removability on a scrap of the same fabric and launder or steam the scrap as you would the finished garment. That rehearsal tells you whether marks will ghost or disappear prematurely.
Project examples to illustrate choices
For a cotton blouse with darts and a few notches, tracing with carbon or marking in chalk works well. For a knit tee with minimal shaping, transfer only the outer outline and rely on pattern weights plus careful cutting. For heavy canvas or denim, chalk or tailor's pencil gives clear, removable lines that survive handling.
When you need many marks visible while you sew, such as multiple pocket placements, pick a method that balances durability and removability. Tailor's tacks made with thread are a reliable choice when surface marks are risky or faint.
Common mistakes and how to avoid them
Shifting and distortion causes
One common error is using too few pins or weights so the tissue shifts while you trace. That produces an off shape that ruins matching seams and can add unwanted ease or tightness in the finished garment. Keep the tissue flat and supported, and check alignment of grainlines before you begin.
Stretching the fabric while marking is another frequent cause of distortion. Handle knits and bias-cut pieces gently and avoid tugging as you trace. If you must hold fabric taut, support the area with a finger beneath the tracing line so the fabric does not pull unevenly.
Wrong marking tools for the fabric
Using a white chalk on a very dark fabric will be invisible, and using a water-soluble pen on a water-sensitive textile risks permanent marks. Match your tool to the fabric and always perform a small test on a scrap. If a pen does not come out of the test scrap after laundering, do not use it on your garment.
Another mismatch is overmarking. Too many lines clutter the fabric and make cutting and sewing harder. Mark only what you need to assemble the garment and use short marks to indicate dart points and notches rather than long lines that get in the way.
Not testing marks or skipping fabric prep
Skipping prewash can leave you with shrinkage after the garment is complete. Not testing marks on a scrap can leave you with ghosting, staining or marks that will not come out. Spend a few minutes on these tests before you commit to the full layout.
Remediation steps include trying to remove marks with the recommended method for the marking tool, hand dabbing a diluted water solution for water soluble marks, or covering faint marks with matching thread during construction so they do not show once the garment is finished.
Practical example: tracing a bodice front onto cotton step by step and wrap up
Materials checklist for this example
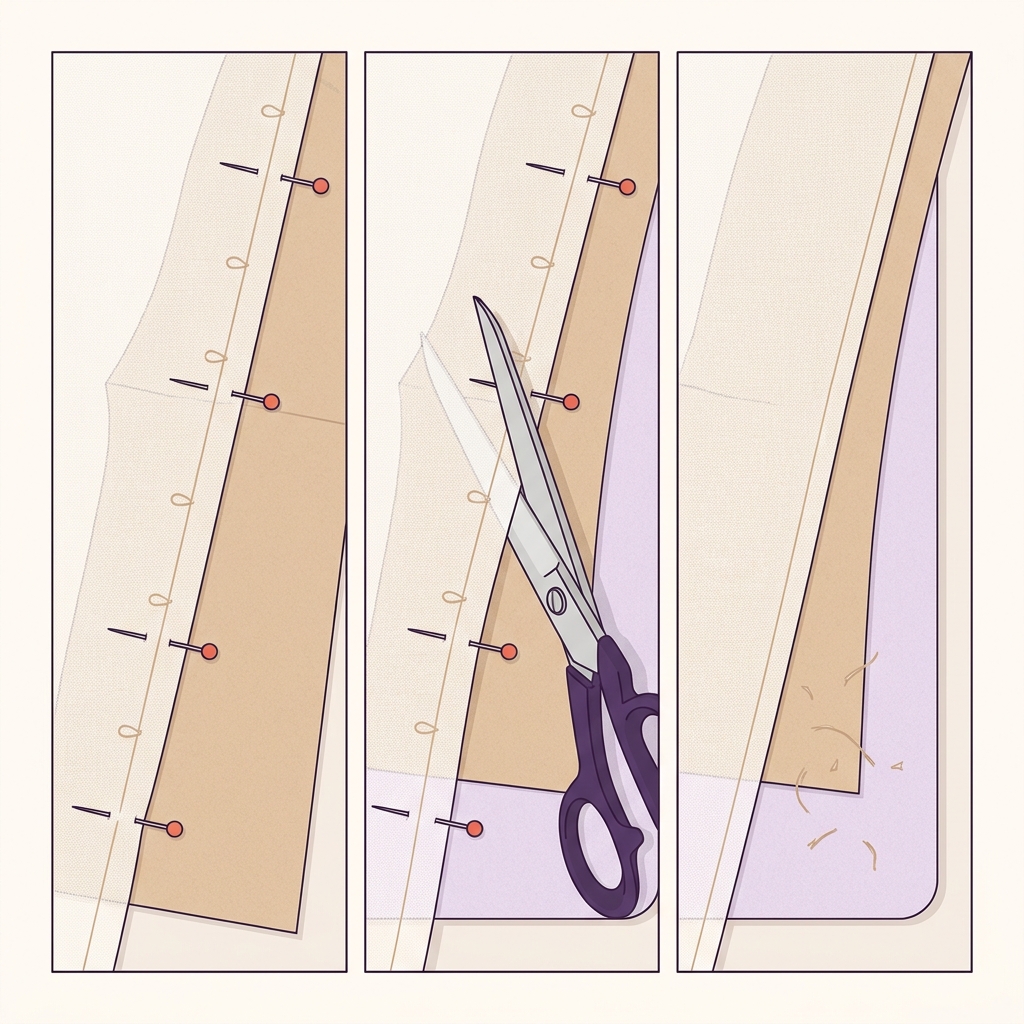
For this example you need pattern tissue for the bodice front, a cotton fabric prewashed and pressed, dressmaker carbon or tracing paper, a medium-tooth tracing wheel, pattern weights, tailor's chalk and a fabric marking pencil for fine points. Also have fabric scissors, pins and a steam iron at hand.
Gather a scrap of the same cotton to test a pen or chalk. Keep a small ruler and a pair of curved scissors for trimming notches if needed. Prepare a clean flat surface large enough to lay out the full pattern piece without folding unless the design requires a fold.
Step by step transfer with tiny photos or callouts
1. Start by prewashing and pressing the cotton so it lies flat. Confirm the grainline on the pattern tissue and align it with the fabric grain. Smooth the fabric and place the tissue so the grainline runs parallel to the selvedge.
2. Weight or pin the pattern at several points along the outline. Place weights near corners and along curves. If you pin, insert pins perpendicular to the edge and keep the tissue flat.
3. If you use tracing carbon, put the carbon dark side down on the fabric, then position the tissue on top. Run the tracing wheel along the outer cutting line and along any internal markings such as dart legs, pocket lines and notches. Keep the wheel pressure steady and follow curves in short even strokes.
4. If you prefer chalk, draw short guideline marks for the cutting line and key points like dart tips. Use tailor's chalk for bold lines and a fine pencil for precise points. On light cotton, chalk erases easily with a dry brush or steam press.
5. For notches, mark small V shapes or short perpendicular snips after cutting. If marking with a pen or chalk, place one small mark close to the edge of the seam allowance rather than a long line. For darts, mark both dart legs and the point clearly so you can transfer them to the opposite piece if needed.
6. Double check all markings. Match notches visually and ensure dart points line up with pattern indicators. Smooth away the tracing carbon dust and re-press the fabric lightly if any chalk looks raised so that the lines sit flush with the cloth.
Final checks before cutting and next steps
Before you cut, verify the grainline on the laid pattern, check that seam allowances are present where required and confirm that mirrored pieces are on opposite folds or have been cut twice. When you cut, use sharp fabric scissors and cut in long smooth strokes to avoid jagged edges. See more on our guides for related techniques.
If a line turned out faint, retrace gently on the fabric scrap to confirm the shape, or add a few tailor tacks with thread to mark critical points. Once pieces are cut, transfer any remaining internal marks to the garment pieces with tailor's tacks so you have durable stitch guides during sewing.
With the fabric pieces ready, proceed to pinning pieces together and basting where needed. A careful transfer at this stage makes the sewing steps straightforward and reduces time spent on fitting adjustments later.
Frequently asked questions
Can I use a regular pencil to mark fabric?
A regular pencil can leave permanent marks and is not recommended. Use a fabric pencil made for textiles or tailor's chalk and always test on a scrap first.
What is the safest method for sheer fabrics?
For sheer fabrics, avoid surface marks and prefer pin-and-cut or basting. Tailor tacks made with thread are also reliable for transferring key points.
How do I remove chalk or pen marks after sewing?
Remove chalk by brushing or steam pressing. For water-soluble pen marks, follow the manufacturer's care instructions and test removal on a scrap before use.
A careful transfer makes the rest of the sewing process feel straightforward. Spend time on prep, test your chosen tool on a scrap and pick the method that balances visibility with removability for your fabric. With practice you will quickly spot which approach works best for each project, and accurate transfers will steadily improve your finished results.
References
- https://madeinsteps.com/guides/beginner-sewing/
- https://madeinsteps.com/guides/embroidery-and-stabilizers/
- https://madeinsteps.com/guides/
- https://www.deborahjsews.com/a-beginners-insight-into-tracing-patterns-on-fabric/
- https://tillyandthebuttons.com/blogs/sewing/how-to-cut-fabric-without-cutting-your
- https://www.sewdiy.com/blog/how-to-transfer-pattern-markings-to-fabric