
The journal
How do I do a stay stitch?
A clear, pattern-first guide to staystitching: what it is, where to place it, stitch direction, and when to skip it.
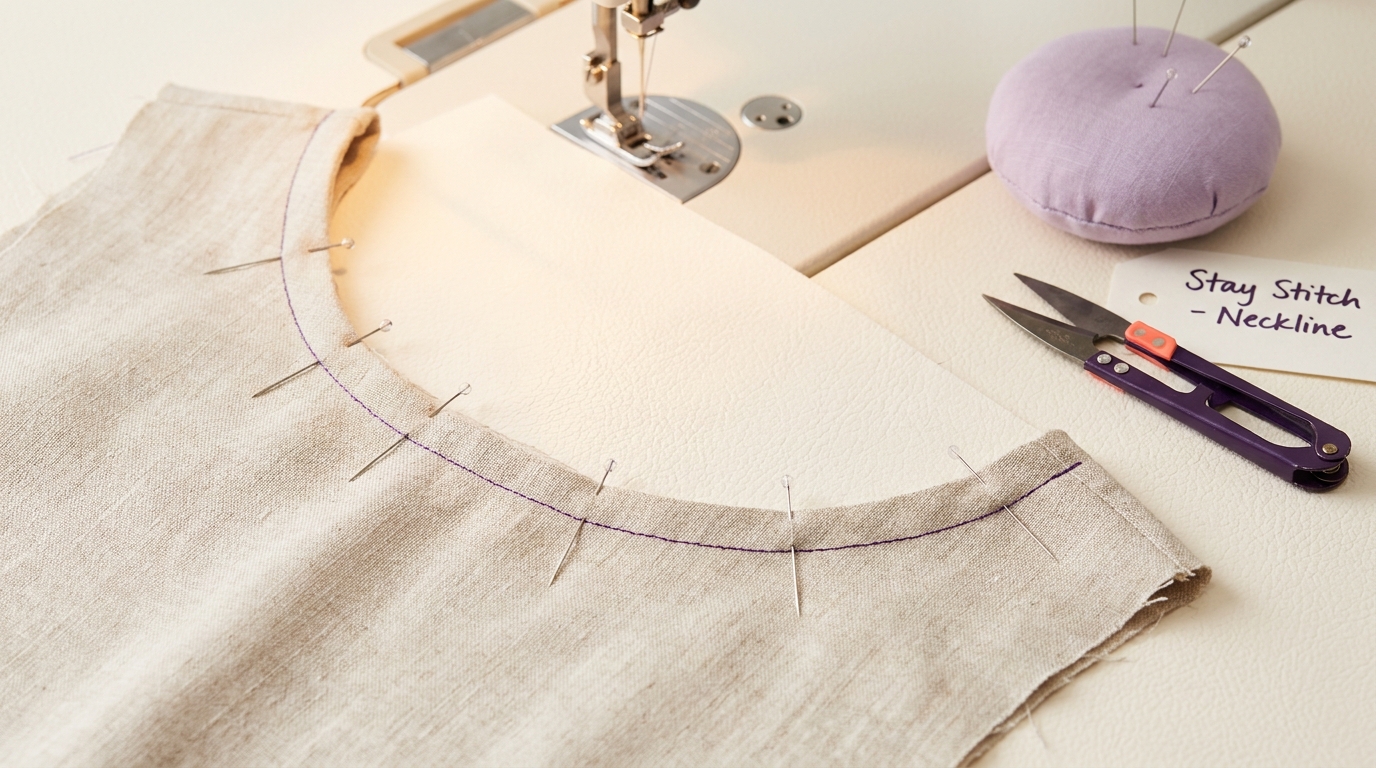
Staystitch by sewing a single straight line through one fabric layer, inside the seam allowance, as soon as you cut the piece. Place it about 1/8 inch inside the seamline so it won’t show, and sew each half of a neckline from shoulder to the center to keep curves from stretching during construction (see Seamwork: How to Staystitch; Tilly and the Buttons: How to Staystitch Fabric). Always follow your pattern’s instructions, your fabric care label and your machine manual, and test settings on scraps.
When to staystitch (and when to skip it)
- Use it on curved or bias edges that can stretch: necklines, some armholes, curved princess seams, bias-cut edges and often shoulders (Seamwork; Tilly and the Buttons).
- Skip it on straight edges cut on grain, and usually on knit fabrics unless your pattern specifically calls for it (Tilly and the Buttons).
- Do it early: staystitch immediately after cutting to prevent handling stretch (Seamwork).
Placement, stitch length and direction
- Placement inside the seam allowance: staystitch roughly 1/8 inch inside the seamline so it hides later. Examples: with a 5/8 inch seam allowance, stitch 1/2 inch from the raw edge (Seamwork); with a 15 mm seam allowance, stitch about 10 mm from the raw edge (Tilly and the Buttons). Always check your pattern for a specified distance.
- Stitch length: use a straight stitch. Many teachers suggest a slightly shorter stitch (around 1.5 mm) for stronger hold on curves (Seamwork), while others use a regular or slightly shorter length (about 2.0 to 2.5 mm). Test on scraps to match your fabric and pattern (Tilly and the Buttons).
- Direction: stitch both sides in the same direction to avoid distortion. For necklines, sew from each shoulder to the center front/back; for armholes (when needed), sew from shoulder to underarm (Tilly and the Buttons; Seamwork).
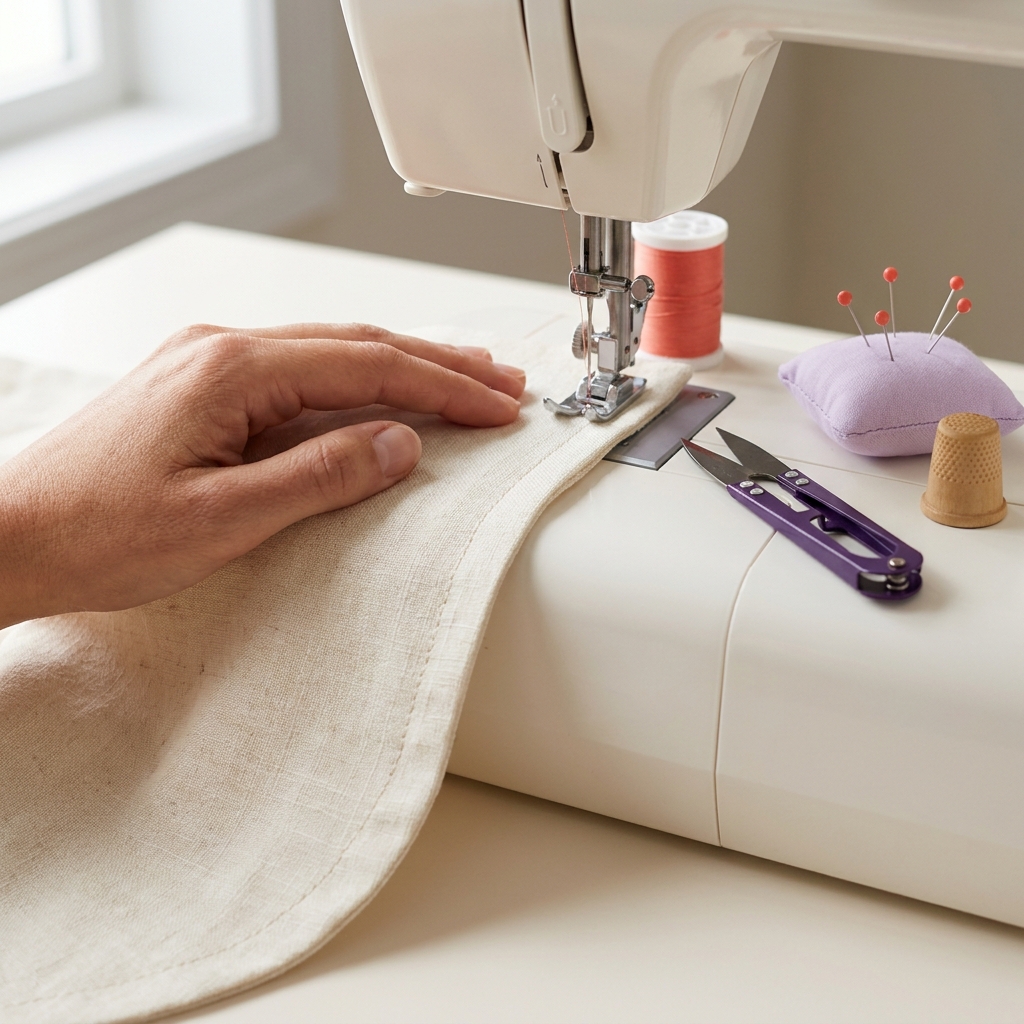
Step-by-step: staystitch a neckline
Prep
- Identify the seam allowance on your pattern and, if helpful, draw a light, removable guideline inside the allowance. Do not use permanent markers.
- Set a straight stitch; choose a test length on scraps of the same fabric. Thread and needle per your machine manual and the fabric; test tension on scraps.
- Lay the piece flat and support the curve so it isn’t hanging or stretching. Press only if your fabric care label allows, at the recommended setting, with a pressing cloth if needed.
Before-you-sew staystitch checklist
Sew
- Sew within the seam allowance at the distance your pattern or testing supports. Keep the fabric relaxed and guide gently; don’t push or pull the curve as it feeds (Tilly and the Buttons).
- Sew from one shoulder to the center. Cut threads, then sew the other shoulder to center (Seamwork).
After
- Lightly press if suitable for the fabric. The staystitch remains hidden in the allowance and helps preserve the shape while you attach facings, bindings or collars (Tilly and the Buttons).
- If the edge still wants to grow, add narrow stay tape or lightweight interfacing on the wrong side before continuing (Tilly and the Buttons). For a refresher on fusing technique, see Attach fusible interfacing properly: clear steps.
Common mistakes and fast fixes
- Visible staystitching after seaming: first check that the permanent seam follows the pattern. Do not move that seam merely to hide a stray staystitch. Once the permanent seam supports the edge, carefully remove only the visible staystitches if necessary without cutting the fabric or stretching the curve (Tilly and the Buttons).
- Ripples or a wavy curve: avoid stretching as you sew, and follow directional stitching. Stabilize with stay tape or lightweight interfacing if the fabric is especially unstable (Tilly and the Buttons).
- Waiting too long: staystitch immediately after cutting; later stitching won’t reverse stretching from handling (Seamwork).
How staystitching differs from other stitches
- Basting: temporary long stitches to hold layers together; removed later. Staystitching is permanent and sewn on a single layer inside the allowance.
- Understitching: stitches a facing to the seam allowance to keep edges rolled in; done after seaming, near the edge.
- Topstitching: visible stitching on the outside for strength or decoration; not inside the allowance.
Good to know
- Neckline and armhole distances vary with seam allowance. If you’re unsure, review your pattern and see What is the standard seam allowance for sewing?
- Knit fabrics: unless your pattern says otherwise, don’t staystitch knits; stabilize as directed by the pattern (Tilly and the Buttons).

FAQ
Do I remove the staystitch?
No. Because it sits within the seam allowance, it is not visible and typically stays in place while you attach facings, bindings or collars (Tilly and the Buttons).
Which way should I stitch a neckline?
Sew from each shoulder to the center front or back so both halves are treated evenly and the curve doesn’t distort (Seamwork).